Z32 "Brake Days!!!" (2/26/05 - 3/3/05)

This page rehearses replacement of pads, brake lines, and rotors on my '91 Nissan 300zx Twin Turbo (aluminum calipers). After going Stage III, I decided it was time to get the brakes in shape. My car doesn't have a ton of miles and the previous owner drove it lightly, as do I (no hard braking). Despite this, the braking doesn't respond how I would expect. I was not looking to dump $2K+ into a "Big Brake" system - just wanted performance, stock-replacement parts.
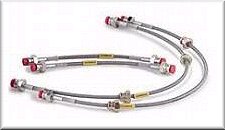
Back in Oct '04, I decided to replace the rubber lines with braided stainless lines. I got a sweet deal ($68.60 + $6 shipping/insurance) bidding on a low reserve listing on eBAY. The relatively new seller now sells them for $156.50 (fixed price) - I think he learned a lesson : ) The lines were sitting around for five months while I waited for better reason to go through the work of removing the tires, calipers, etc.

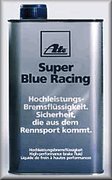
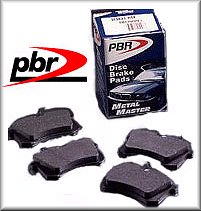
Well, a better reason never came around - I had to make one up. I bought some slotted-cross drilled Brembo rotors off eBAY (came with PBR Metal Master pad set). I also bought two bottles of Super Blue Racing brake fluid from this seller. He combined my shipment, always a plus.
I picked up SpeedBleeders from SPLParts.com. I wish I would've picked up the brass shifter bushings from SPLParts at the same time (to avoid another $8 shipping) as I plan on installing a short shifter soon. Oh well.
![]()
Last, I knew I should take the time to spiffy up the calipers while they were off. I debated, as everyone else, on which color to go with...yellow, gloss black, semi-gloss black, white, red, even slighty orange (a-la Brembo 350z). After reading that some have had problems with brake dust ruining the great look of their red or yellow calipers, I decided to go completely different that what I was thinking: Iron Cast Grey. Walmart, Autozone, and Checker all carry Dupli-Color Ceramic Engine Enamel in 500 and 1000 degree varieties - 1000 is supposed to be "toasted" appropriately. Walmart has the best price for the paint - what a surprise.

SEE DUPLI-COLOR ENGINE ENAMEL COLOR CHART HERE - Choose Wisely - You don't want to do this too many times, nor do you need TT.net members harassing you.
Total Cost of Parts:
Brembo Rotors and PBR Pads: $290
Part #'s Rotors:
40206-04U03 / 09.5921.10 UPC: 8 20584 59311 0 / 43206-43P01,
09.6912.10 UPC 8 26732 27551 2
Part # Front Pads: D 1170 RM (replaces 23-460-01, 088-1383M) UPC:
8 26732 02531 5
Part # Rear Pads: D 461 RM (replaces 23-461-01, 088-1406M) UPC: 8
26732 02967 2
Super Blue Racing Fluid: $18 (2
liters, 1 liter per bottle)
Goodridge Brake lines: $68.60
Part #: 22073 2/89-96
300zx All Models
Speed Bleeders: $36
Part #'s: SB1010 [x2]
10mm x 1.0 and SB7100S [x1] 7mm x 1.0)
Shipping (total): $31.29
Total: $380.29 (I didn't add in
the cost of paint, brake cleaner, CRC Brake Quiet goop, and any
other smaller stuff that you may already have laying around)
From what I've seen, this is a really good price for the package. $600 seems to be the going rate WITHOUT Speedbleeders. You do have to factor in that I got lucky on the stainless lines and had to make three separate orders. Service from each of these vendors was equally great. I couldn't believe the shipping cost (low) offered by the vendor I purchased the rotors from (eBAY). That was a HEAVY package being sent for just $17.29 insured! Email response from each seller was also phenominal. I am impressed with all the parts - each appears to be top-quality and exactly what I expected, including the slotted-cross drilled rotors from this eBAY seller.
I was careful to purchase only from eBAY sellers that had 99.5% or better feedback. In my opinion, any good seller with lower than this has some problems (98% means they rip off or provide poor service to AT LEAST 2% of their customers, and those are the 2% that have either the knowledge or willingness to complain). Imagine if FEDEX, UPS, or USPS didn't deliver 2% of packages - YIKES!
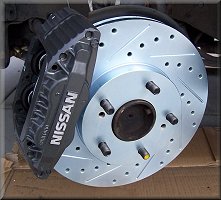
![]()
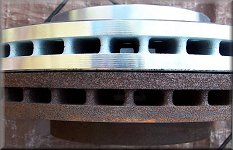
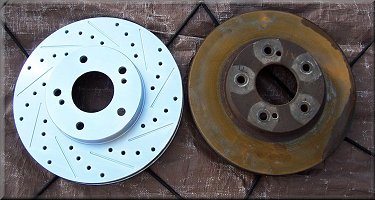

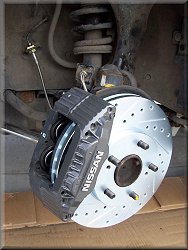
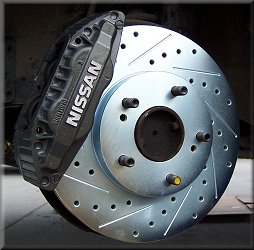
Brembo Rotors - Slotted and Cross Drilled - Direct (Stock) Replacement
Time to Install !!!
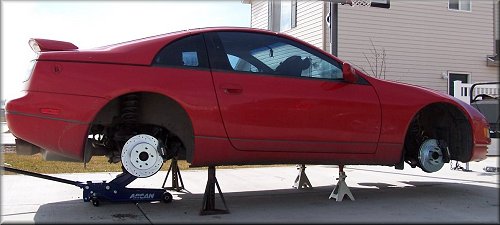
I loosened the lugs and jacked it up. I have never jacked up a car on all fours before. so I was a little timid. Alas, it was easy as pie; no scares. I printed off and followed the instructions in several TT.net write-ups (Stainless Steel Brake Line Installation, Brake Pad Installation, Rotor Replacement, E-brake Adjustment, and Caliper Painting).
Be smart - follow the directions on these pages AND follow the procedures and instructions given with your PRODUCTS (i.e, don't overtighten SPEEDBLEEDERS, BREAK IN YOUR NEW PADS and ROTORS, etc). Read instructions several times before starting and take it slow your first time around to make sure you don't overlook or do anything wrong...although you can reverse MOST THINGS you do with a brake job, remember to have that "measure twice, cut once" attitude.
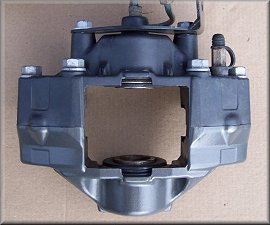
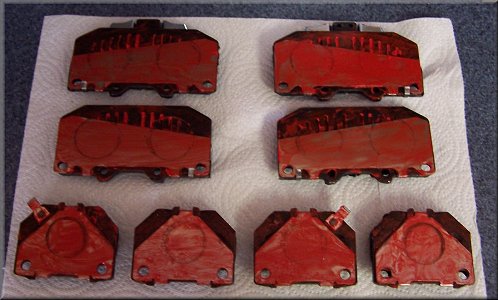
I pulled the pads and stuffed all the removed parts in marked zip-lock bags (FR, FL, RR, RL). The pads, rotors, calipers and brake lines were all in perfect shape (minus dirt). I cleaned everything up nicely. I should have ordered new shim kits, but I didn't. I thought about caliper rebuild kits, but there is not a single sign of problem with these calipers (rubber is soft and grippy - knock on wood).
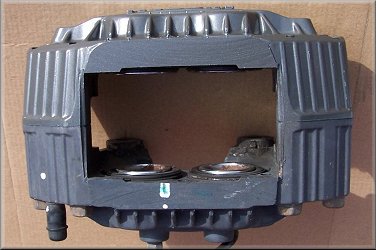
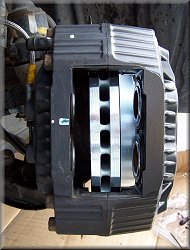
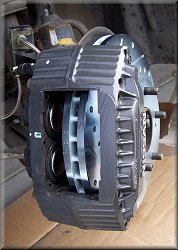
I decided to paint only the OUTER HALF of the calipers. Since only this half can be seen, and since painting them is PURELY asthetic, I saw no reason to go through the trouble of painting the back side (around the tubes, etc, would be a pain). Masking off the back half also makes it much easy to hold/rotate the calipers while you are painting, and makes it easier to set them down to dry. Another benefit is the ease of handling them for installation (if they are not fully cured). These advantages and the fact that you won't ever see the back-side of the caliper makes painting the front side only a reasonable decision - some may even argue that the heat dissapation is better with less paint (??? - probably negligible).
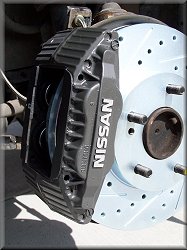
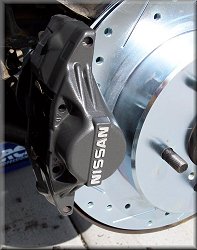
The front calipers were discolored plenty. The rears didn't really need painting - they were nearly perfect and uniform in color. However, to keep things equal, I painted them all. I masked off the back side and centers and used petroleum jelly for the NISSAN logos (Q-tip with light coat of the jelly makes it easier - you don't want to get the jelly ANYWHERE else, obviously, as the paint will NOT adhere to the surface in those areas).
I painted coats 10 minutes apart with a very light initial coat, then three good coats. It took one full can exactly (little to spare) - just be careful if you get to the bottom of the can as they always start sputtering. I avoid the very bottom of the can after some sad experiences with some yellow cam covers on my 84 NA (had to strip the entire paint job and redo it). FOLLOW THE DIRECTIONS ON THE SPRAY CAN! If you try to add a coat after 1 hour, the original coats will REACT and wrinkle up. Will make you cry!
After about 10 hours of drying I removed the paint from the Nissan logos on all four calipers using my thumbnail and a set of tweezers. I worked the paint from the edges in, a little time consuming and I was probably being a bit more careful than I needed to be (I didn't want it to peel off around the edges of the letters). The paint is still a bit tacky at this point so the tweezers helped remove any sticky flakes.
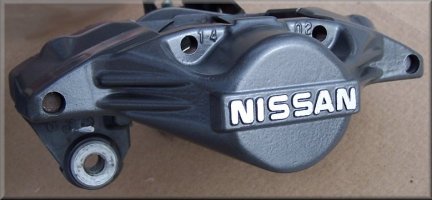
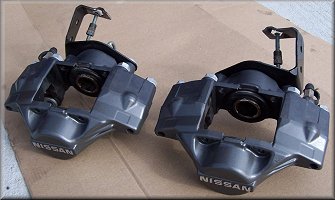
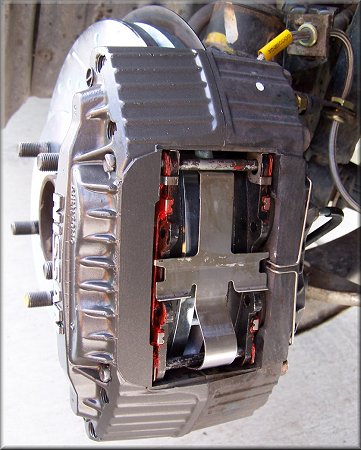
Rear Calipers - Only Front Side Painted - Logo Left as Original (use Vaseline)
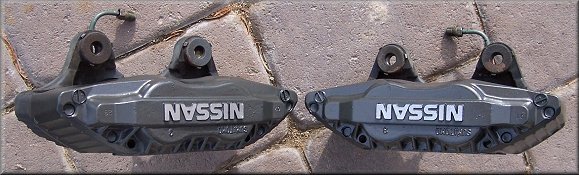
Front Calipers - Only Front Side Painted - Logo Left as Original (use Vaseline)
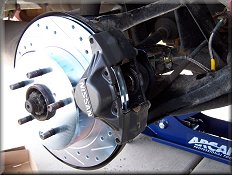
I waited 24 hours to put the calipers back in place - everything is back together (except pads). I'm going to give the calipers a few days to cure before installing the pads and driving. I also took the time to get the E-Brake pads properly set onto the rotors...6 clicks gets 'em nice and tight now (before I had to pull the e-brake level all the way up and still had to worry about it rolling). The shoes for the e-brake look thin, but Nissan specs shows 1.5-3 mm being acceptable. I understand the e-brake shoes are not a normal wear item and are rather expensive, too (not stocked).
PICTURES with WHEELS (stock)/TIRES INSTALLED COMING SOON : )
I ran into only a couple difficulties while doing all these tasks. 1) The brake line nuts on the rear brakes a little tough to remove - small turns and possibility of stripping. Be careful with those. I had to pull the passenger side hardline from further down (attaches underneath to a small box. After pulling it, I was able to get a firm grip and get the nut loose from the original rubber brake line. 2) The upper rear caliper bolts are a little tough to get to and torque down because of restricted space for manuevering the torque wrench. 3) Although not tough, cleaning the old shims is a pain in the butt, messy, and time-consuming. I would suggest getting a shim kit instead of cleaning the old ones (AT LEAST the fronts). 4) I don't have an FSM (factory service manual) and I couldn't find a picture of how the little "corner" retaining shim was to be attached to the front pads. I think I figured it out correctly - they were on incorrectly before, but they didn't make noise when they were in before, either.
Calipers, SS
Lines, and Pads Installed
Picture Overkill!!!
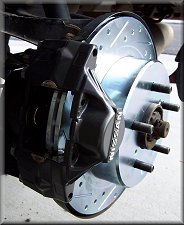
Front-Drivers Side


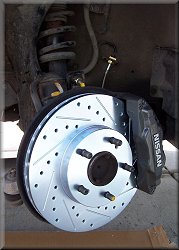
Front-Passenger Side
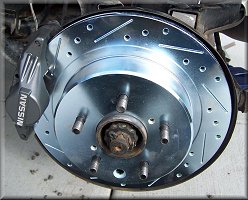
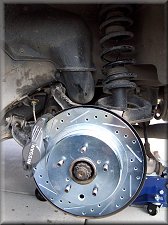
Rear-Drivers Side
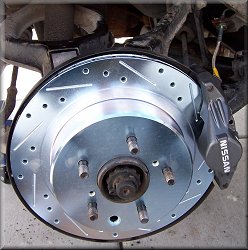

Rear-Passenger Side
PAD
PREPARATION and INSTALLED PICS
(note proper
installation of shims - include a BRAKE QUIET substance like CRC
or the junk that comes with the Nissan Brake Hardware Kits. This
stuff is MESSY - use latex gloves)
![]()
![]()
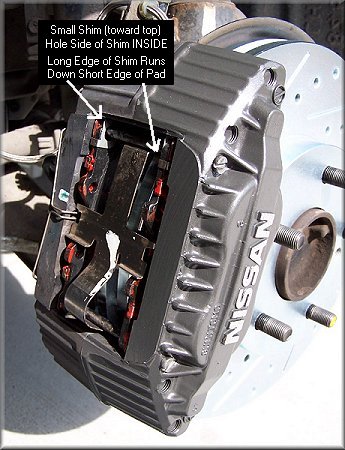
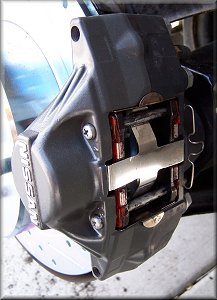
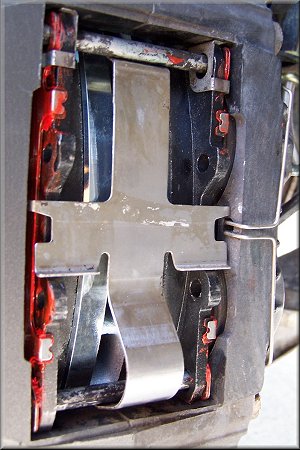
Front Pads - Slotted Shim, Then Angled (full on some models), then the retainer. Use BRAKE QUIET compound on front and back of slotted shim, then put some on the back of the pad (metal side). Add on the angled shim and put a light coat on the back. Let the compound "set up" for a while before install (to avoid a mess and the possibility of getting it on the braking surfaces). The LITTLE CORNER SHIM should be installed as shown on the left - the long edge of the shim should run down the short edge of the pad - the HOLE side should be on the INSIDE of the pad and hook around to the OUTSIDE. It should be on the side of the pad where the ANGLED SHIM edge is shorter. When the pad is installed on into the caliper, the long edge of the angled shim should be on the low side of the caliper (toward the ground) and the small shim should be on the upper side of the caliper.
Note the location of the small shim in relation to the pad and other shims.
Pass Side Front (Left) || Driver Side Front (Right)

Rear Left, Rear Right, and FRONT RIGHT close-up
BLEEDING!!!
No pictures - it was a CINCH with the SpeedBleeders. Still good to have two people (for filling reservior and making sure fluid doesn't spill : )
All Rotors/Calipers/Stainless Lines/Pads Installed and System is Bled - Waiting for Caliper Paint to Cure Before Replacing Wheels and Breaking in the Pads and Rotor. : )
Prepartion and BREAK IN PERIOD!!!
After bleeding the brakes thoroughly, I "dropped" the car, replaced the wheels and torqued appropriately. Take time to clean up the wheels while they are off as you can do a much better job. I put an EXTREMELY thin coat of anti-seize compound on the mounting side of the wheel that will come in contact with the rotor. I don't even know if this is a good idea, but I figured it might help with rust prevention (since the contact area with the rotor is stressed together by the torque of the lugs - water could get in there and rust). Again, I don't know if this is recommended, but I did it anyway.
Brembo and Metal Master both have suggested break-in procedures.
Brembo says: "TESTS AND RUNNING IN: Road test the vehicle making sure to check for vibrations and noises while driving, during the test avoid braking for more than 3 seconds at any one time. Advise the customer that a period of bedding in is required to obtain maximum braking effect, and they should avoid heavy and prolonged braking for 150-200 miles."
PBR says: "BREAK-IN PROCEDURES: After installing the new brakes, they need to be broken-in properly. To condition friction and rotors correctly, the following procedures should be followed: 1) Accelerate vehicle to 40 mph. 2) Apply the brakes using light to moderate pedal effort to reduce speed to approximately 10 mph. 3) Repeat steps 1 and 2 at least ten times, allowing 1/4 mile between cycles. UNDER NO CIRCUMSTANCES drive the vehicle with the brakes continually applied as a break-in procedure BECAUSE: 1) Excessive heat will be generated. 2) Resins will burn. 3) Loss of braking efficiency could occur.
Last, if you have replaced or adjusted your e-BRAKE shoes, Nissan suggests: "
How you decide to do all three of these at the same time is up to you, but I think you can safely say that you need to take it easy on the brakes for a while - you might want to avoid breaking around corners and take it easy when coming if necessary to drive on the freeway during the break-in period.
Final
Pictures of Cleaned Up Installation!!!
(wash and wax the
car for full effect : )
s continually appli
FUN!!!
Now I get to drive around and enjoy better braking, more dumb stares from the envious : )
ENJOY THE RIDE!!!
written and photographed by thumper300zx.com
many thanks to
those who have "gone before" to write very helpful
brake-related procedures